How to input a building
Before you start

Required images:
- A building overview
- Floor plans for all floors
Required data - area, exposure, bedrooms and etc.
Check steps 4 and 6 for details.
About the input steps:
- After each step you may pause and then resume.
- Once completed, you could no longer go back to a previous step.
- Almost all of the data could be edited later, except for the fields marked with yellow. Be very careful when entering those.
- You can not skip steps.
Look for those icons: Those are there to help you.
Step 1 - Common building data
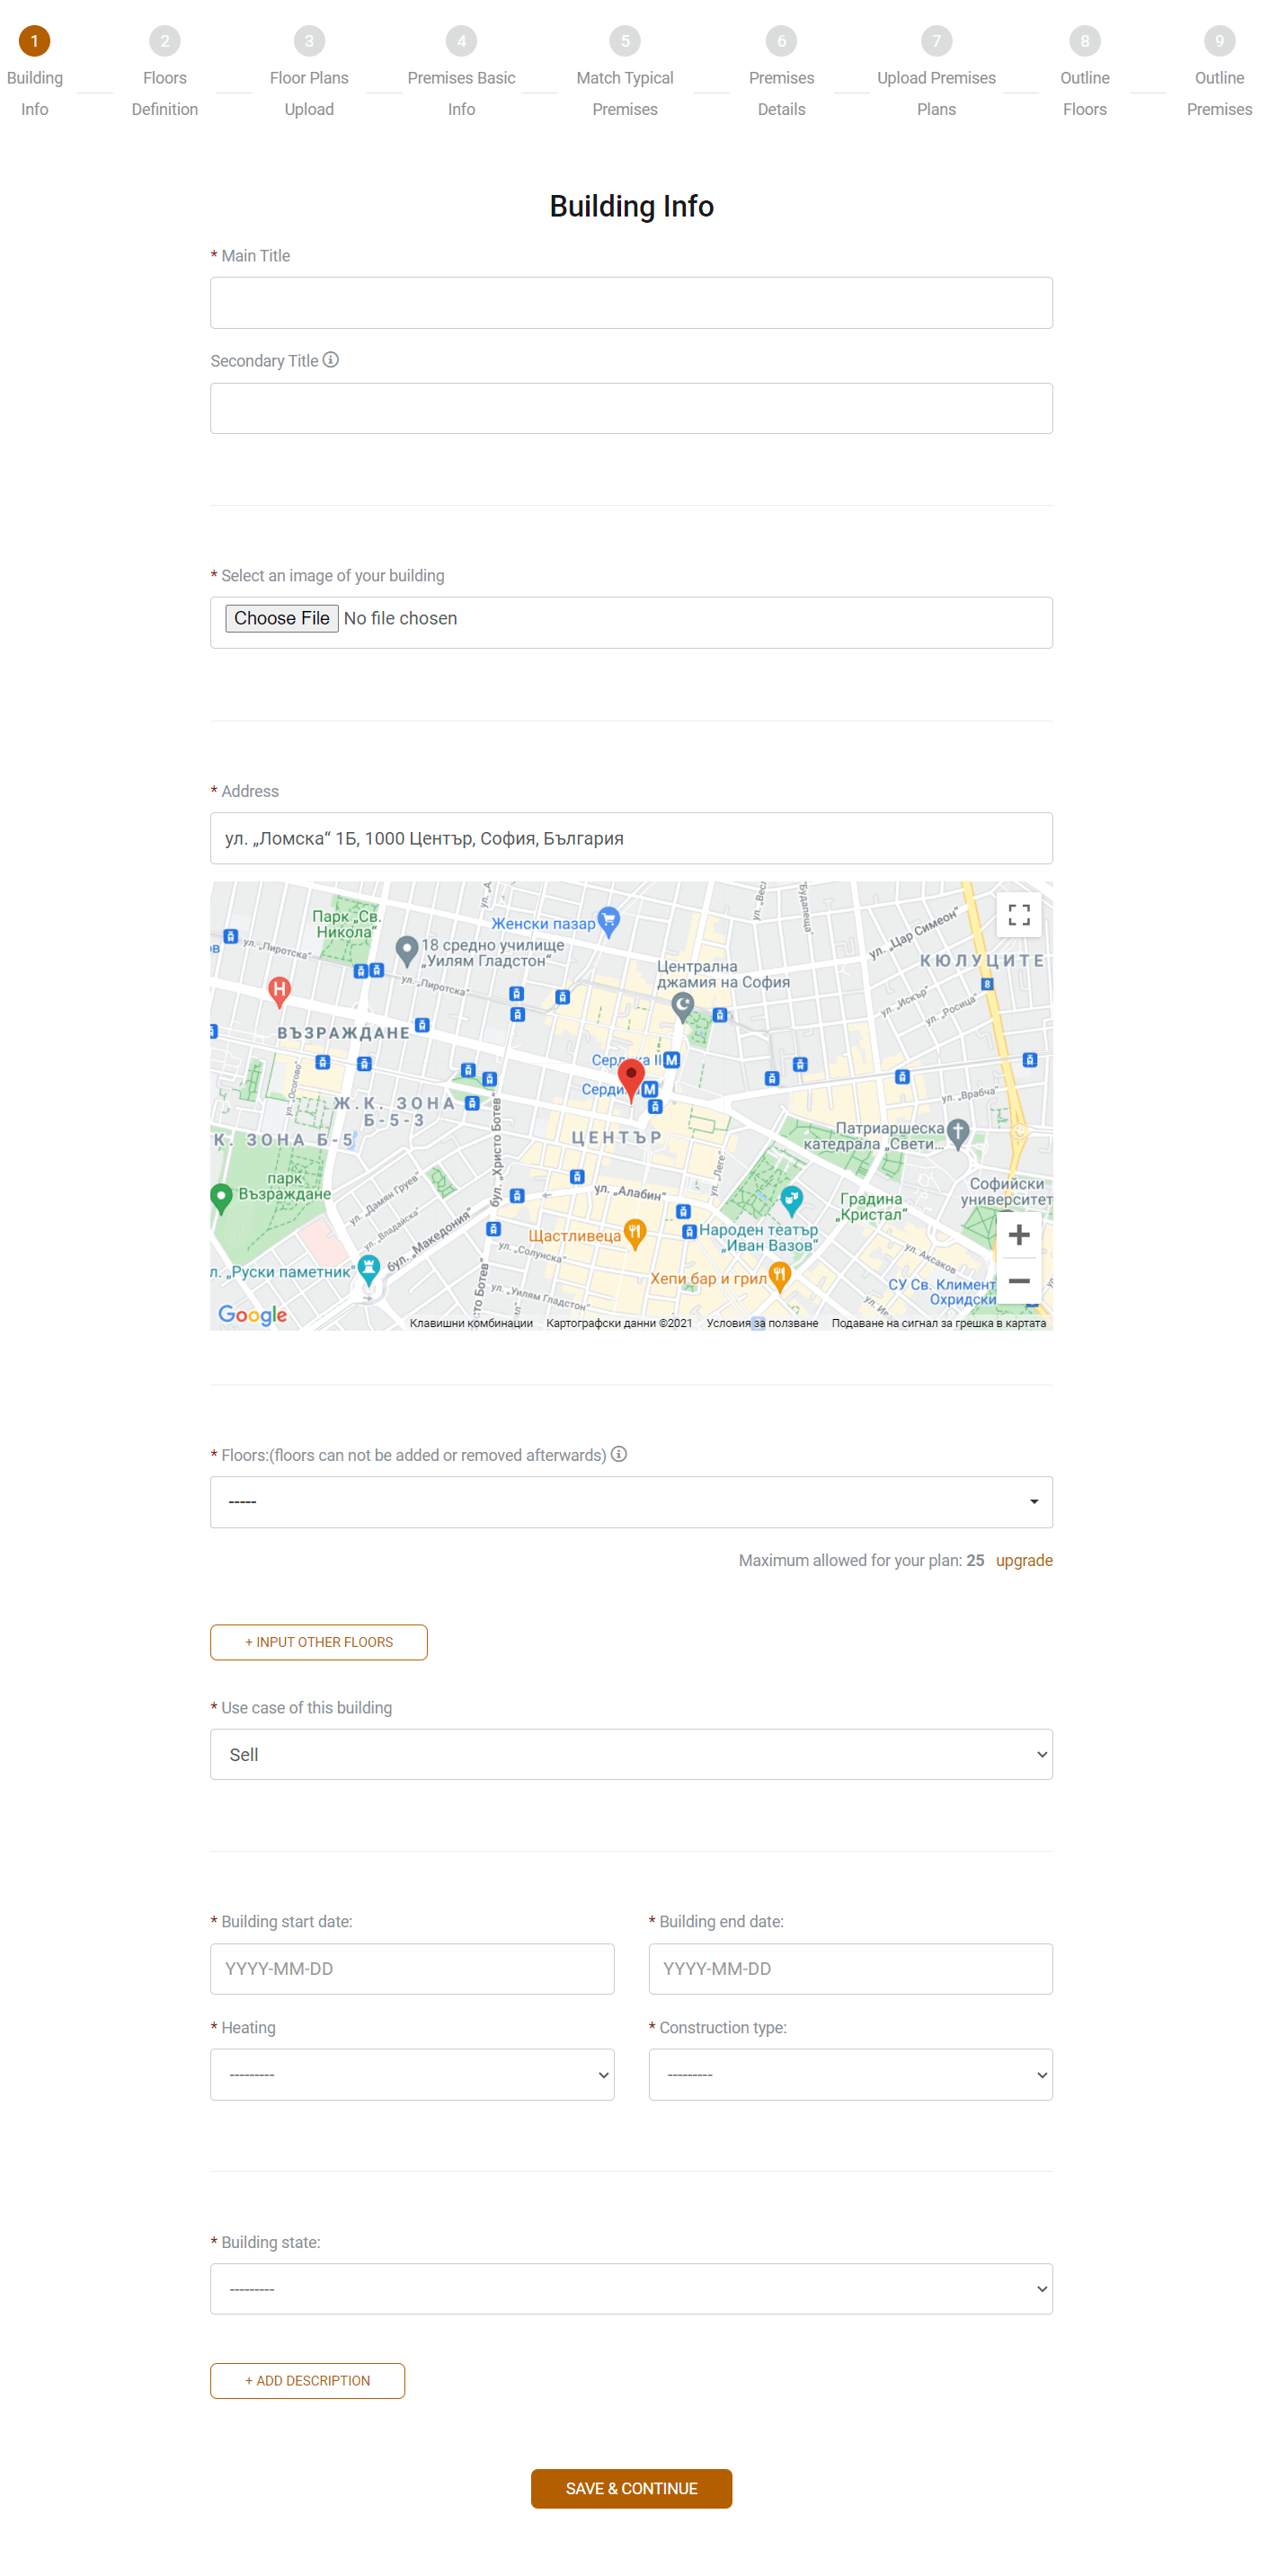
You will input the common data about your building. Address, floors, building preview,
etc.
Building representation should be less than 3300 px in width. If you upload bigger we will
automatically downsize that image.
In selapt you could input three types of floors.
There are overground, underground and service floors.
Overground floors /called just "floors"/ are all that you could see on the building
representation and have premises to sell or rent on them. Those are fully interactive - you
may click on them to load floor plans or see free premises on hover. You can not edit those
later.
Underground floors typically hold parking spaces and basements. Those allow you to define
premises on them but those premises are not interactive.
Service floors are used for common functionalities like a technical floor or kitchen floor,
etc.
You may skip adding service and underground floors on the building input and add those
later.
Step 2 - Information About Floors
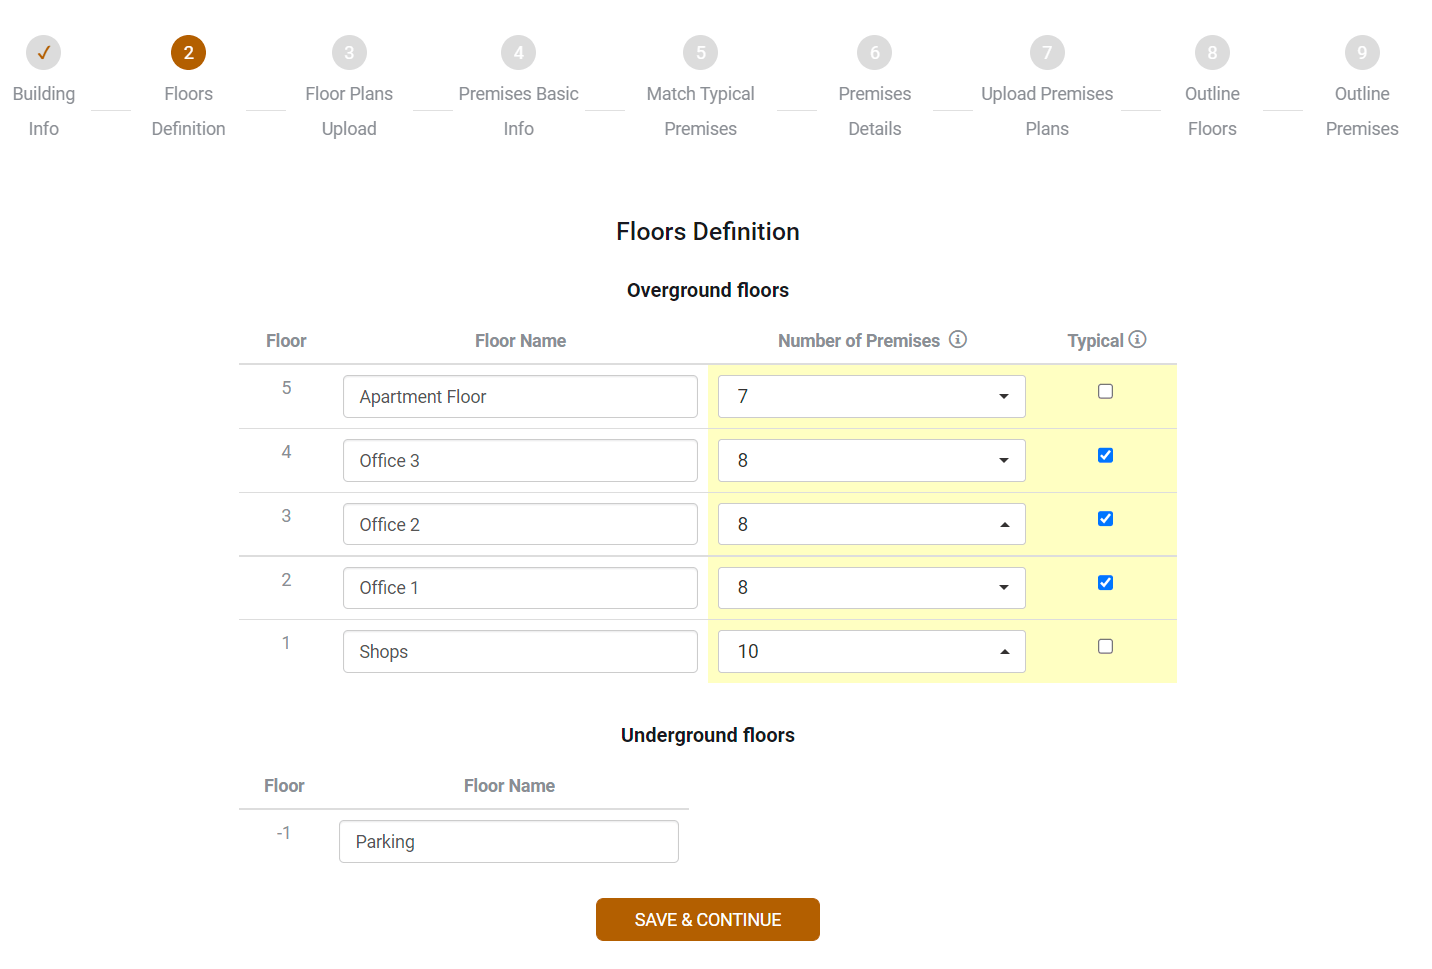
In this step, you have to provide base information about floors.
In selapt we have provided the opportunity to enter typical/identical/ floors. This will save you time because you have to input the data of the premises on typical floors just once.
You have to be careful when entering the number of premises per each floor and if the floor is typical because those could not be edited later.
Step 3 - Upload Floor Plans

In the step, you will be asked to upload floor plans for all floors.
Floor plans must be a valid picture of any popular picture formats, but their width must
be less than 3300px.
If you upload a picture with a higher width, we will automatically downscale
that for you but it might cause some minor quality loss.
Step 4 - Enter Base Premises Data
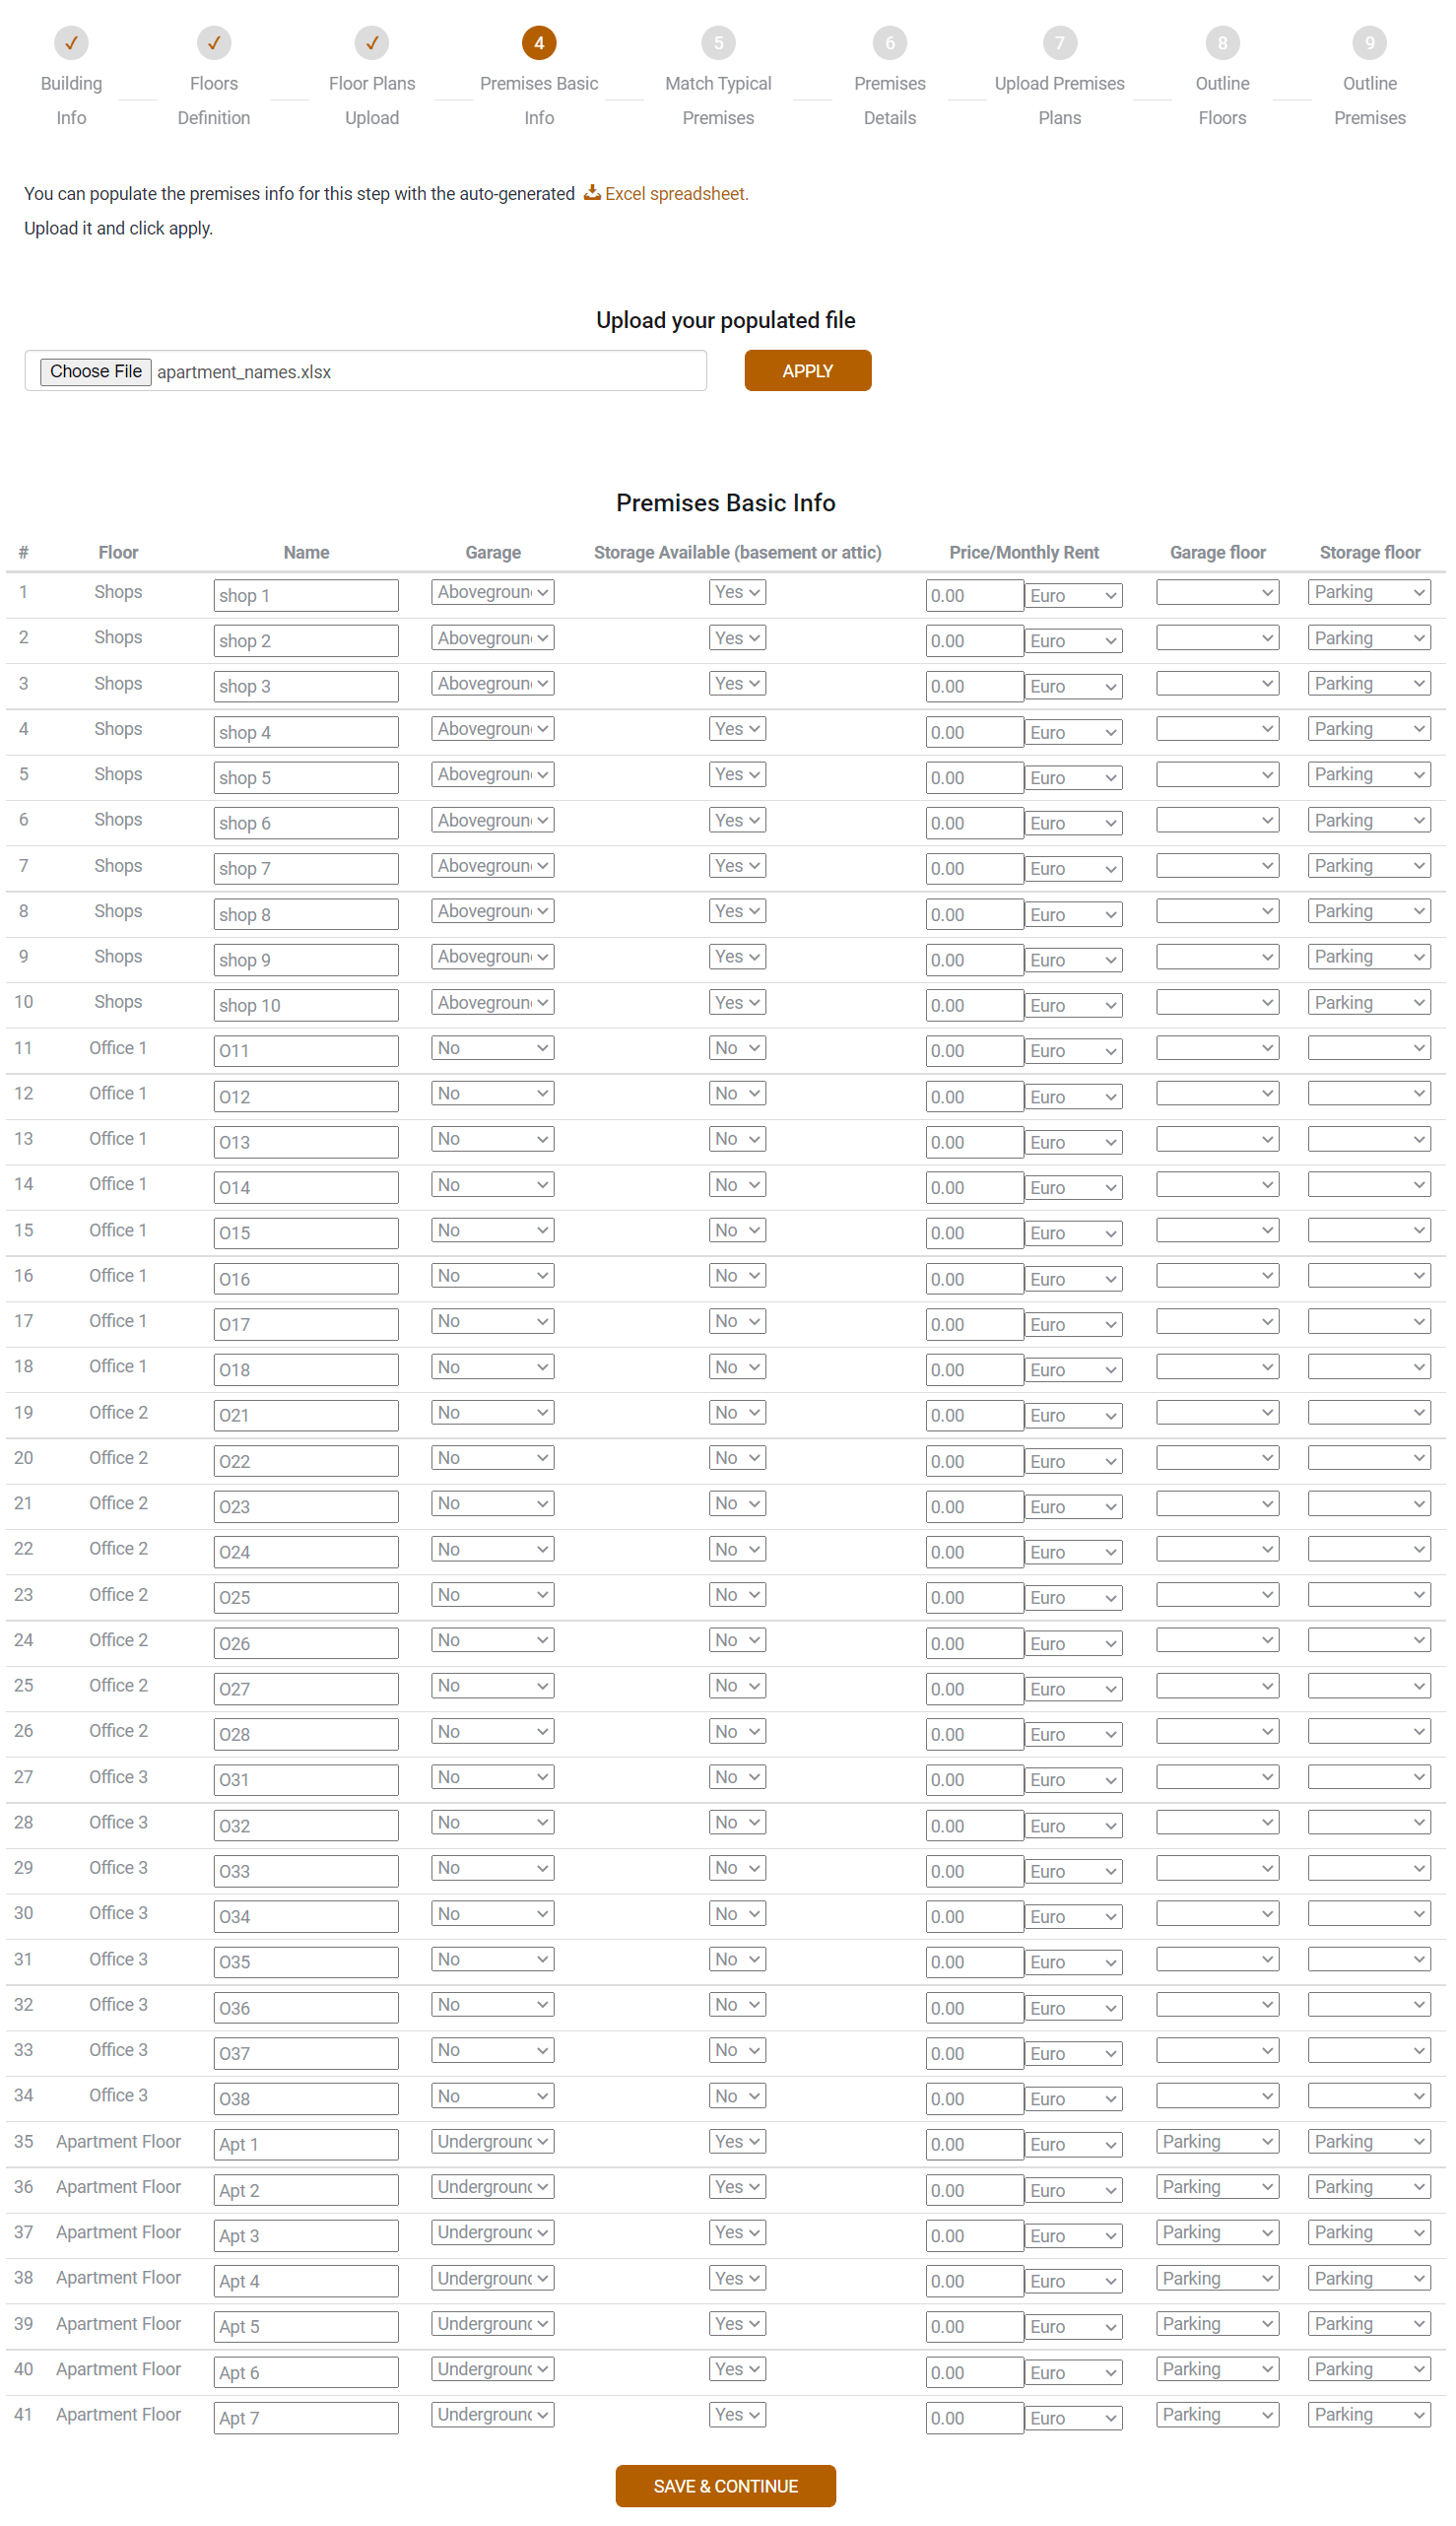
Step 4 is about entering base premises data - names, prices and etc.
In selapt you could enter premises relation with the underground floors, if you have defined
any.
This allows you to point easily where the premises parking spot is, for example.
Of course, you could skip this now and add or edit that relations later.
Alright! Yes, we know that the data entering could be annoying! We have implemented entering data with spreadsheets for some steps. Download the .xls file provided, input the data and upload it back to us. If you like, you could download one of our building's example .xls by clicking here.
Step 5 - Same Premises Sets
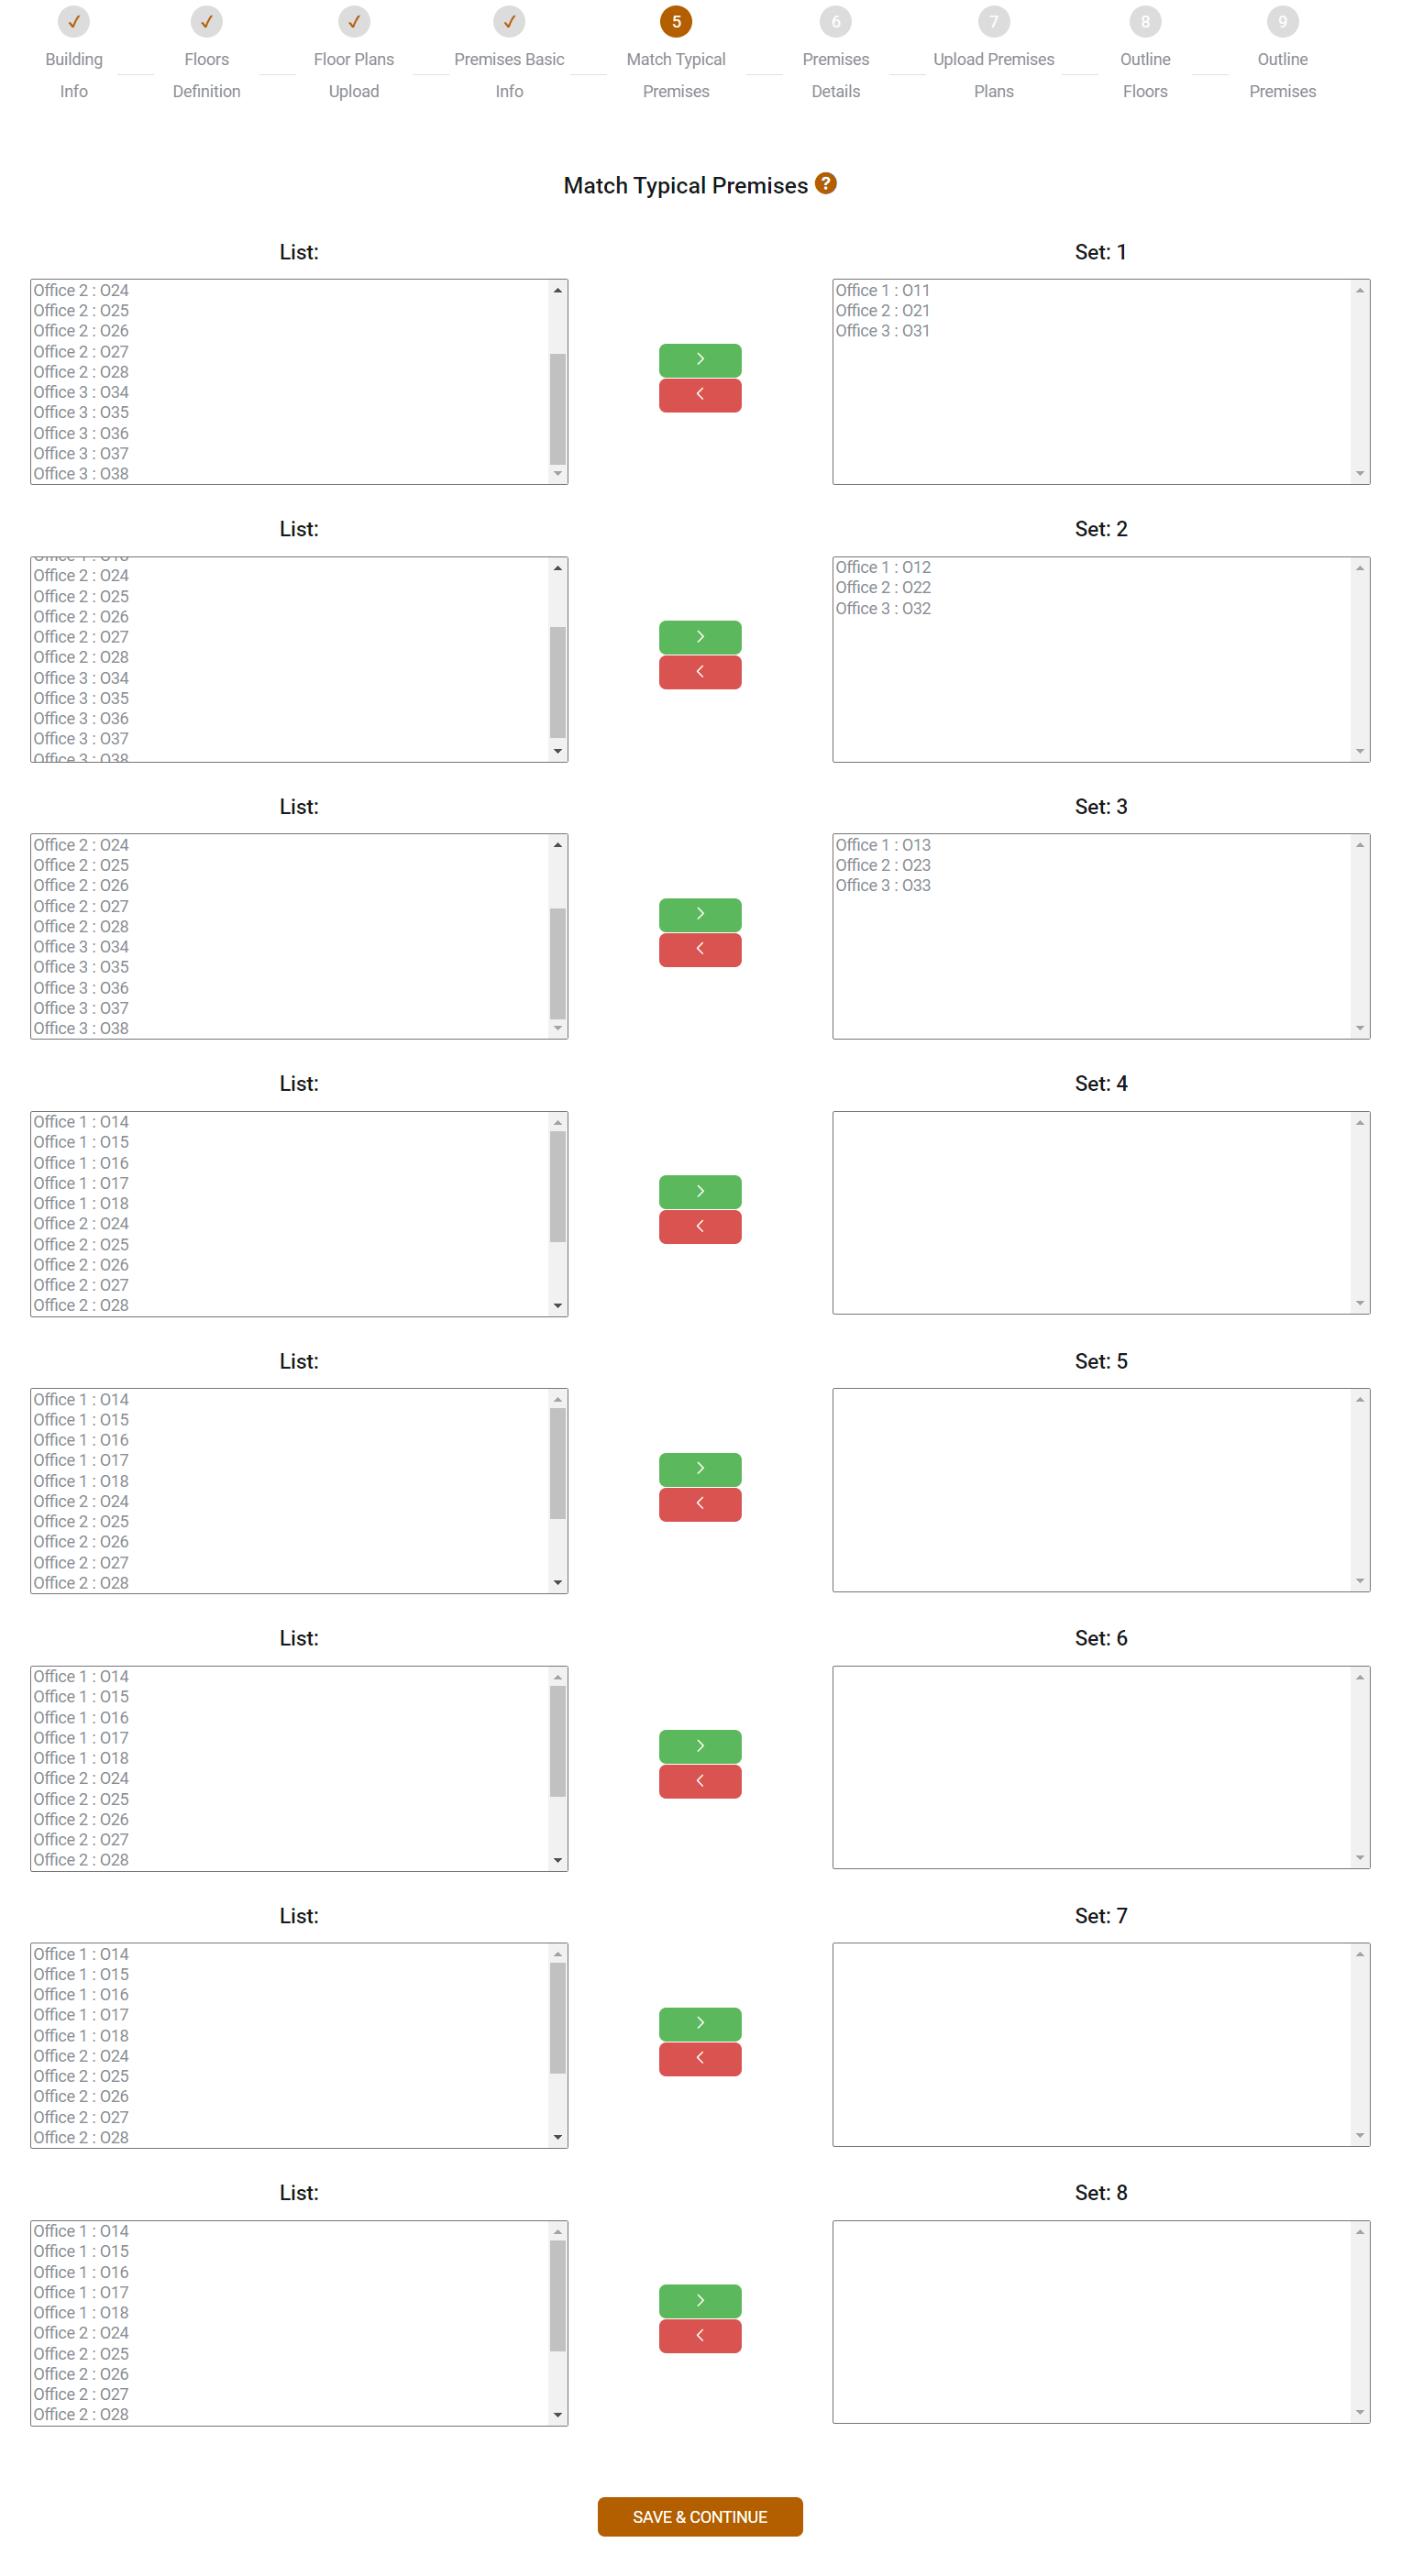
This step is optional and appears only if there are typical floors.
You have to point all identical premises on the those floors, grouping them in sets.
Data into this step could not be edited later.
Step 6 - Premises Details

In this step, you are required to input details about premises - area, transition,
exposure
and so on.
O11, O21, and O31 are entered only once because they are on a typical floor.
Like in step 4, here you could also input data with spreadsheet.
You may download the .xls file that we used for this step from
here.
Step 7 - Premises Plans

In the step, you will be asked to upload premises plans.
Must be a valid picture of any popular picture formats.
This step is not mandatory. You could skip adding plans for all or some premises.
If so, we will generate premises plans automatically based on floor plans and coordinates
that you provided.
Step 8 - Outline floors

Here is where the fun part begins!
You will have to outline floors.
Use left click to create a point.
Right click on a point will remove it.
Step 9 - Outline premises
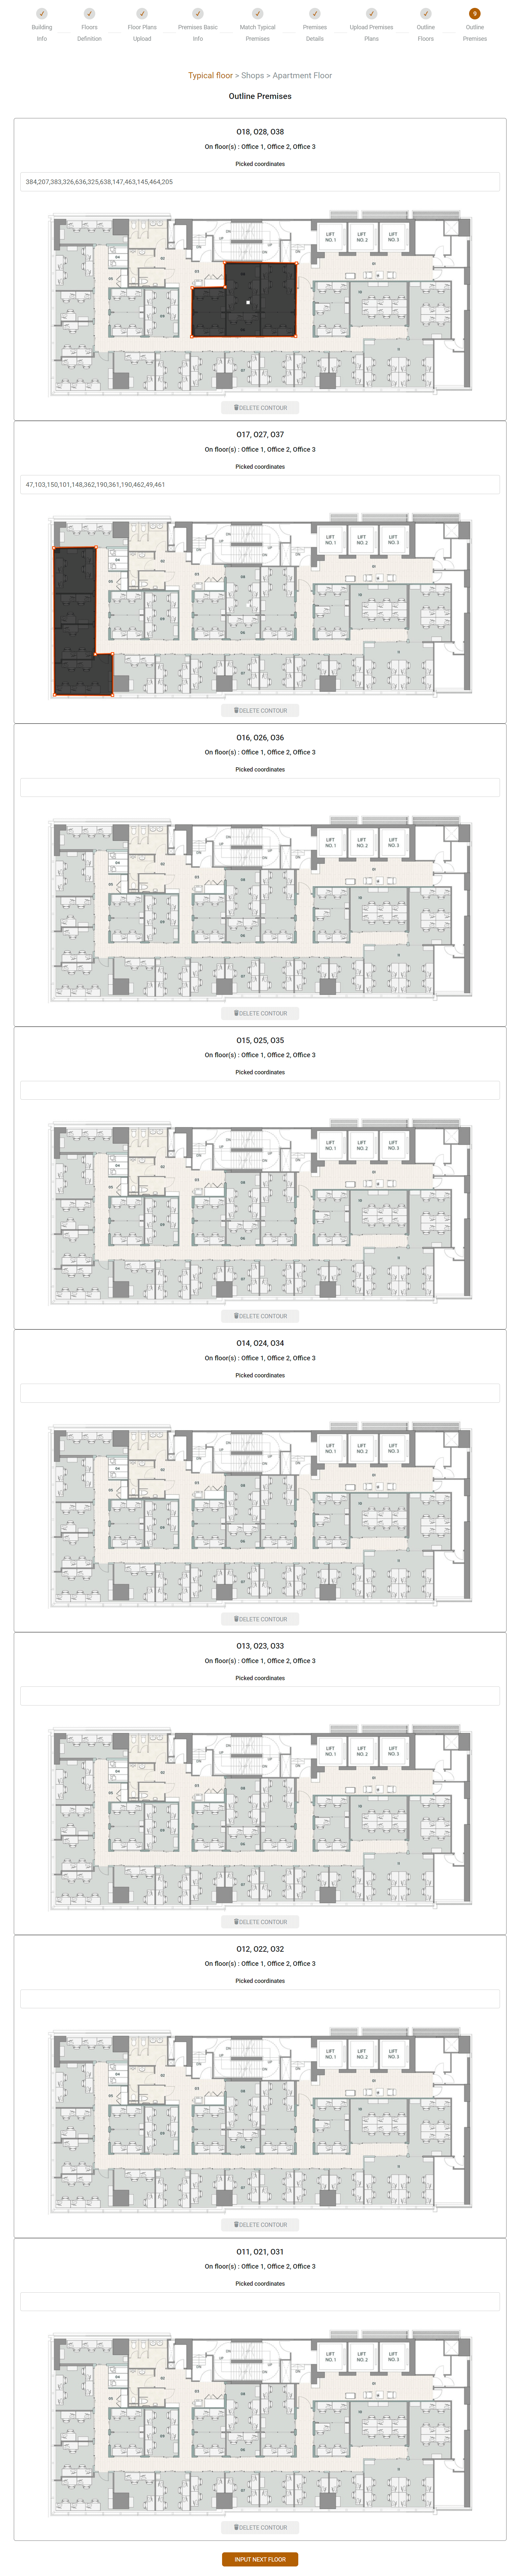
Last set of steps. Just like the previous step, you will have to highlight the premises on
each floor.
Typical premises are highlighted only once.
Input is floor-by-floor based. You may pause and resume after each floor.